prefect
Home Engineering Publications
WPI Technical Theatre Handbook: Chain Motors
 
  next up previous contents index
Next: Flying Set Pieces Up: Fly Methods Previous: Lifts   Contents   Index

Chain Motors

Figure 4.9: A CM Lodestar chain motor with slings and lighting truss, flown from the ceiling in Alden Hall at WPI.
\begin{figure}\psfig{file=rigging/chmtr2.eps}\end{figure}

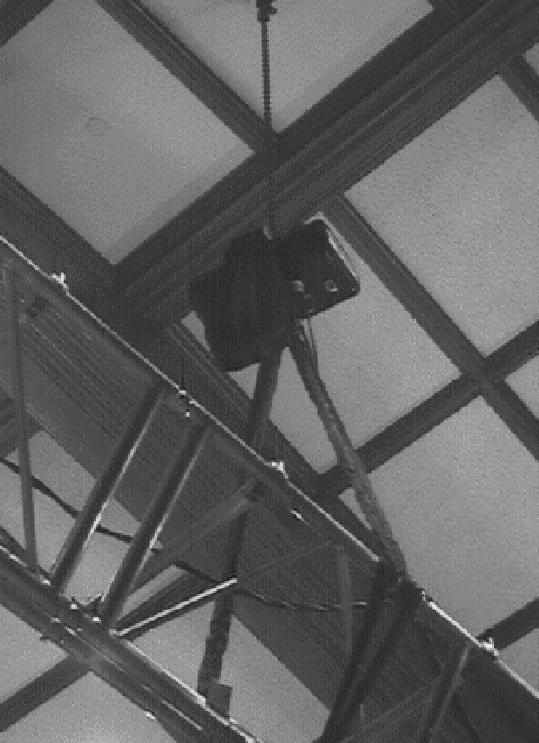
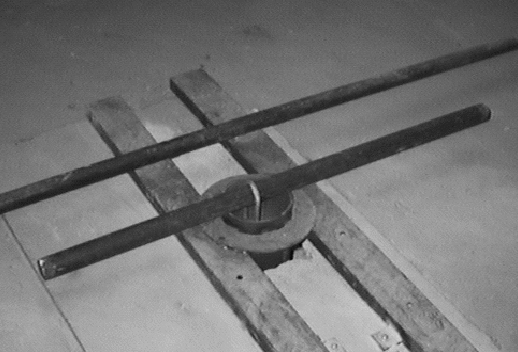
While lifts provide a fairly effective means to fly equipment, they have several downfalls. For one, they are typically large and quite heavy. If used in pairs, two to three people are required to operate them safely. Safety issues aside, they are simply inconvenient in a lot of situations. Lastly, lifts take up a lot of floor space. In typical theatrical uses, the ideal placement of the lift conflicts with house seating. These are all areas that the chain motor excels in. If appropriate load-bearing hang points are available in a venue (as they are in WPI's Alden Hall), the simplicity and convenience of chain motors makes them an ideal solution for flying lighting trusses and other equipment.

A chain motor is simply a large electric motor with a gearbox and a chain drive mounted in one chassis. The chassis of the motor generally has a large hook mounted on its underside, to which loads are attached. An extremely heavy gauge chain with a hook at one end passes through the motor and into a chain bag. The hook of this chain is generally clipped to the shackle of a wire rope sling, which is attached to a load-bearing overhead beam. Once the attachment has been made to an overhead hang point, the motors can have loads attached for flying.

Several methods exist for the control of the chain motors. The simplest method uses handheld controls (sometimes called pickles) to raise and lower the motors. Complex computer-controlled systems exist for automatic flying of equipment. These systems can control dozens of motors simultaneously. Systems this complex are not generally necessary for a small number of chain motors.

At WPI, a pair of chain motors with handheld controls are often used to fly lighting truss. The most common venue for this is Alden Hall, where several sets of hang points exist for such a purpose. The following list of instructions should be followed for proper use of the chain motors:

  1. Choose a set of hangpoints to use. Three sets exist at varying distances from the stage.

  2. Place one chain motor roadcase under each hang point. Exact alignment isn't necessary at this point.

  3. Obtain access to the Alden Hall attic. Find the drop ropes stored in the attic. Tie them off with a figure eight knot to a beam nearest the hangpoints being used. Drop them through the hangpoint holes.

  4. In the hall, tie the drop ropes to the wire rope slings. The wire rope slings should be attached to the chain of the chain motor by use of a shackle.

  5. Locate two lengths of 2 inch iron pipe. These are stored near the drop ropes in the attic. Making sure people are clear of the chain area in the hall, raise one drop rope. When the wire rope sling is through the hole, slip the iron pipe through the sling, as in the figure 4.10. Repeat for the other rope.

  6. Locate the backup safety cables and attach them to each wire rope sling. These safety cables are attached to the metal ceiling beams, and are of appropriate length to attach to the slings and provide for a backup if the main hang points should fail for any reason. They should be attached to the wire rope slings using 1-ton rapid links or heavy duty steel carabiners. This is the last of the work that needs to be done in the attic.

  7. In the hall, attach power and control cabling to the chain motors. Raise each motor out of its roadcase until it is at a convenient working height. Slings may be attached to the hook of the motor, either directly, or by the use of a large shackle.

While working with chain motors are fairly straightforward, there are several points one should be concerned with when working with them:

  • Pay close attention to the chain when raising and lowering the motors. Note any binding, noises, or other problems. Discontinue use of the motors if the problem appears to be serious.

  • Inspect attic rigging frequently. If the motors are to be flown for long periods of time, inspect daily for any signs of impending failure in any piece of the rigging.

  • Don't fool around with the motors. It's very tempting, but it should be avoided due to excess wear and tear on the motors.

  • Keep the handheld controls out of public access. Don't leave them lying around so anyone can wander in and use the motors.

  • Turn off the power breaker when motors are not in use. This is to prevent unintentional movement of the motors.

Figure 4.10: View of a hang point in the Alden Hall attic. The 2 inch iron pipe passes through the wire rope sling, which comes through the hole from below. The pipe at the top of the image is not related to the rigging. Note that the required safety cable is not shown in this image.
\begin{figure}\psfig{file=rigging/hangpt2.eps,width=4.5in}\end{figure}


next up previous contents index
Next: Flying Set Pieces Up: Fly Methods Previous: Lifts   Contents   Index
Steve Richardson 2000-07-06

Use of information in this document implies understanding and agreement with the copyright and terms of use. Specifically, no warranty is expressed or implied regarding the accuracy of the information contained within. YOU USE THIS INFORMATION AT YOUR OWN RISK. All trademarks are property of their respective owners. You must obtain permission from the author before using the contents of The Handbook for anything other than private use.

Table of Contents

[PDF] [Whole book in PDF 5.3MB]

 
Page last modified:
Copyright © 1993-2000 prefect - All Rights Reserved.